Get started
Run your first evaluation
Create a BenchDX evaluation, connect it to a target model with Evaluation Trigger, monitor every test case, and review the completed result.
This tutorial follows the current BenchDX workflow from creation to a completed report. It uses Evaluation Trigger, so you can complete the first run in the platform without writing an API integration.
Before you begin
Have these items ready before creating the evaluation:
| Prepare | Why it is needed |
|---|---|
| An active workspace with BenchDX access | The LLM → BenchDX menu requires the effective module code bench-dx and suitable member access. |
| Enough BenchDX credits | Credits are deducted from the active workspace when the evaluation is created. |
| A model name and version | These identify the model being tested. You can create a new name and version in the evaluation dialog. |
| A reachable target-model API | Evaluation Trigger needs its URL, required headers, request shape, and the JSON path containing the model answer. |
1. Create a benchmark evaluation
Open LLM → BenchDX, then complete the creation flow:
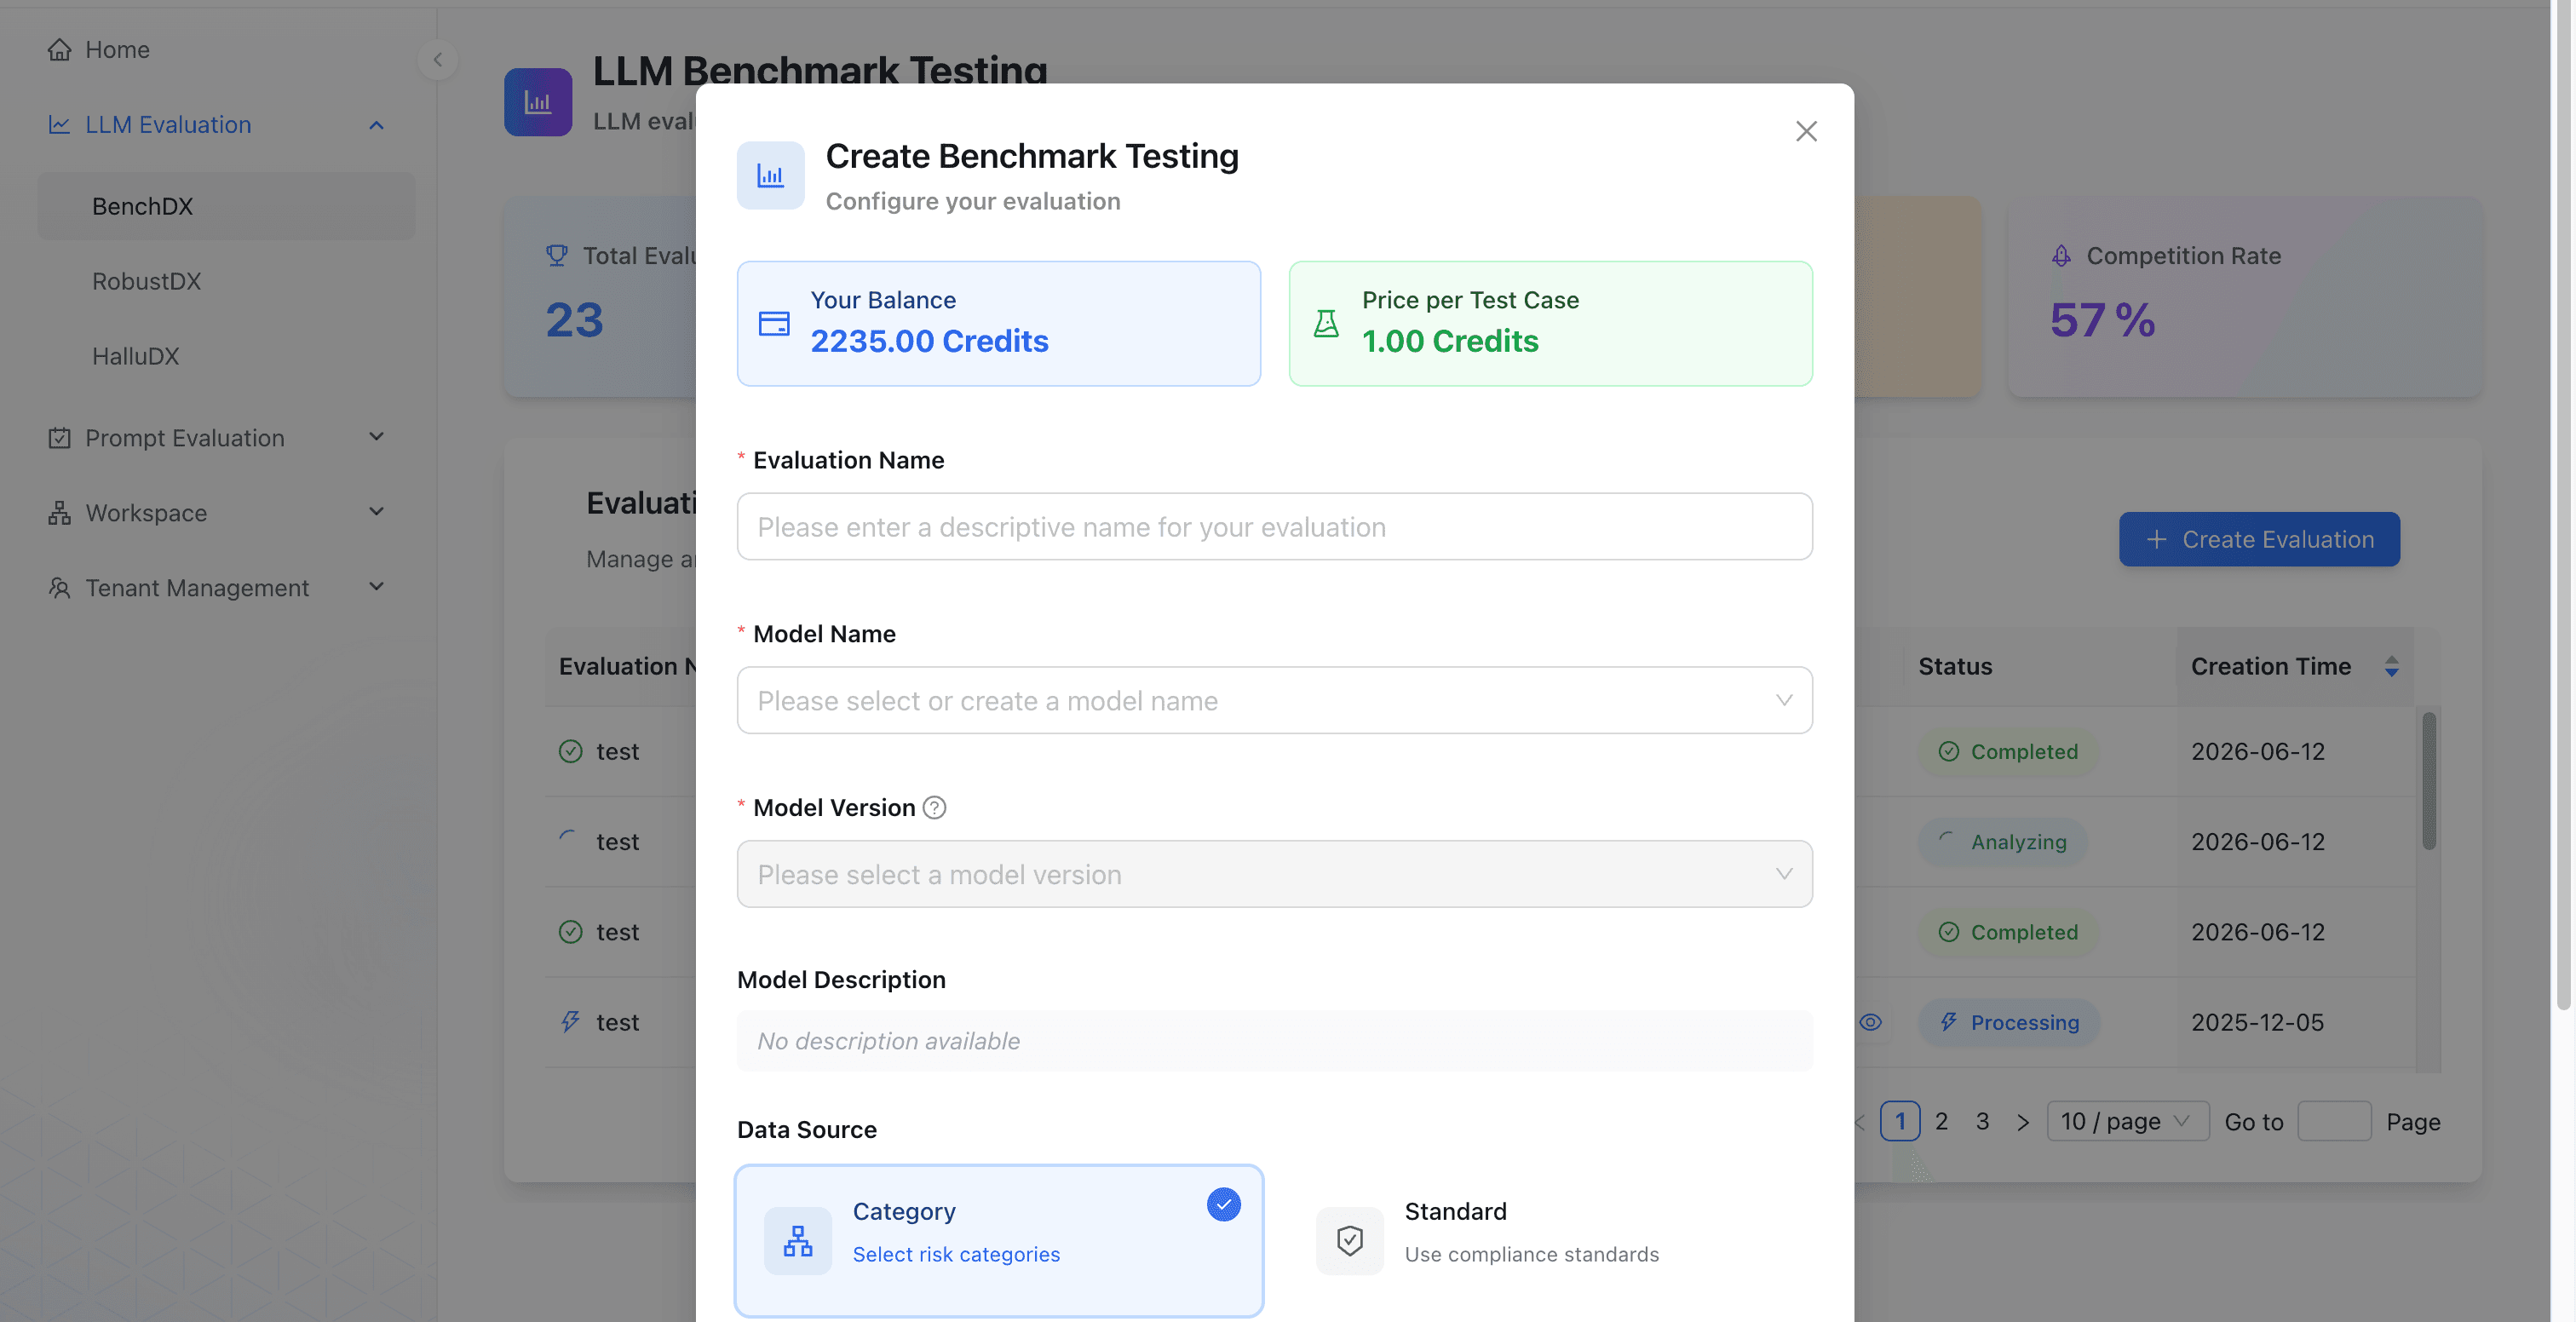
Select Create Evaluation
Enter an evaluation name that makes the tested model and purpose easy to identify later.
Choose the model
Select a Model Name and Model Version, or create them from the same dialog.
Choose the benchmark source
Select Category and one or more risk categories, or select Standard and one or more supported evaluation standards.
Continue to Cost Review
Check the test-case count, unit price, total cost, current workspace balance, and remaining balance.
Confirm & Create
Confirm only after the model version, benchmark source, and cost are correct.
After creation, the Request Tutorial opens automatically. The evaluation remains Awaiting Trigger until model responses begin to arrive.
2. Configure Evaluation Trigger
Open the new evaluation and select Evaluation Trigger. A trigger template tells AIDX how to call the target model and where to find its answer.
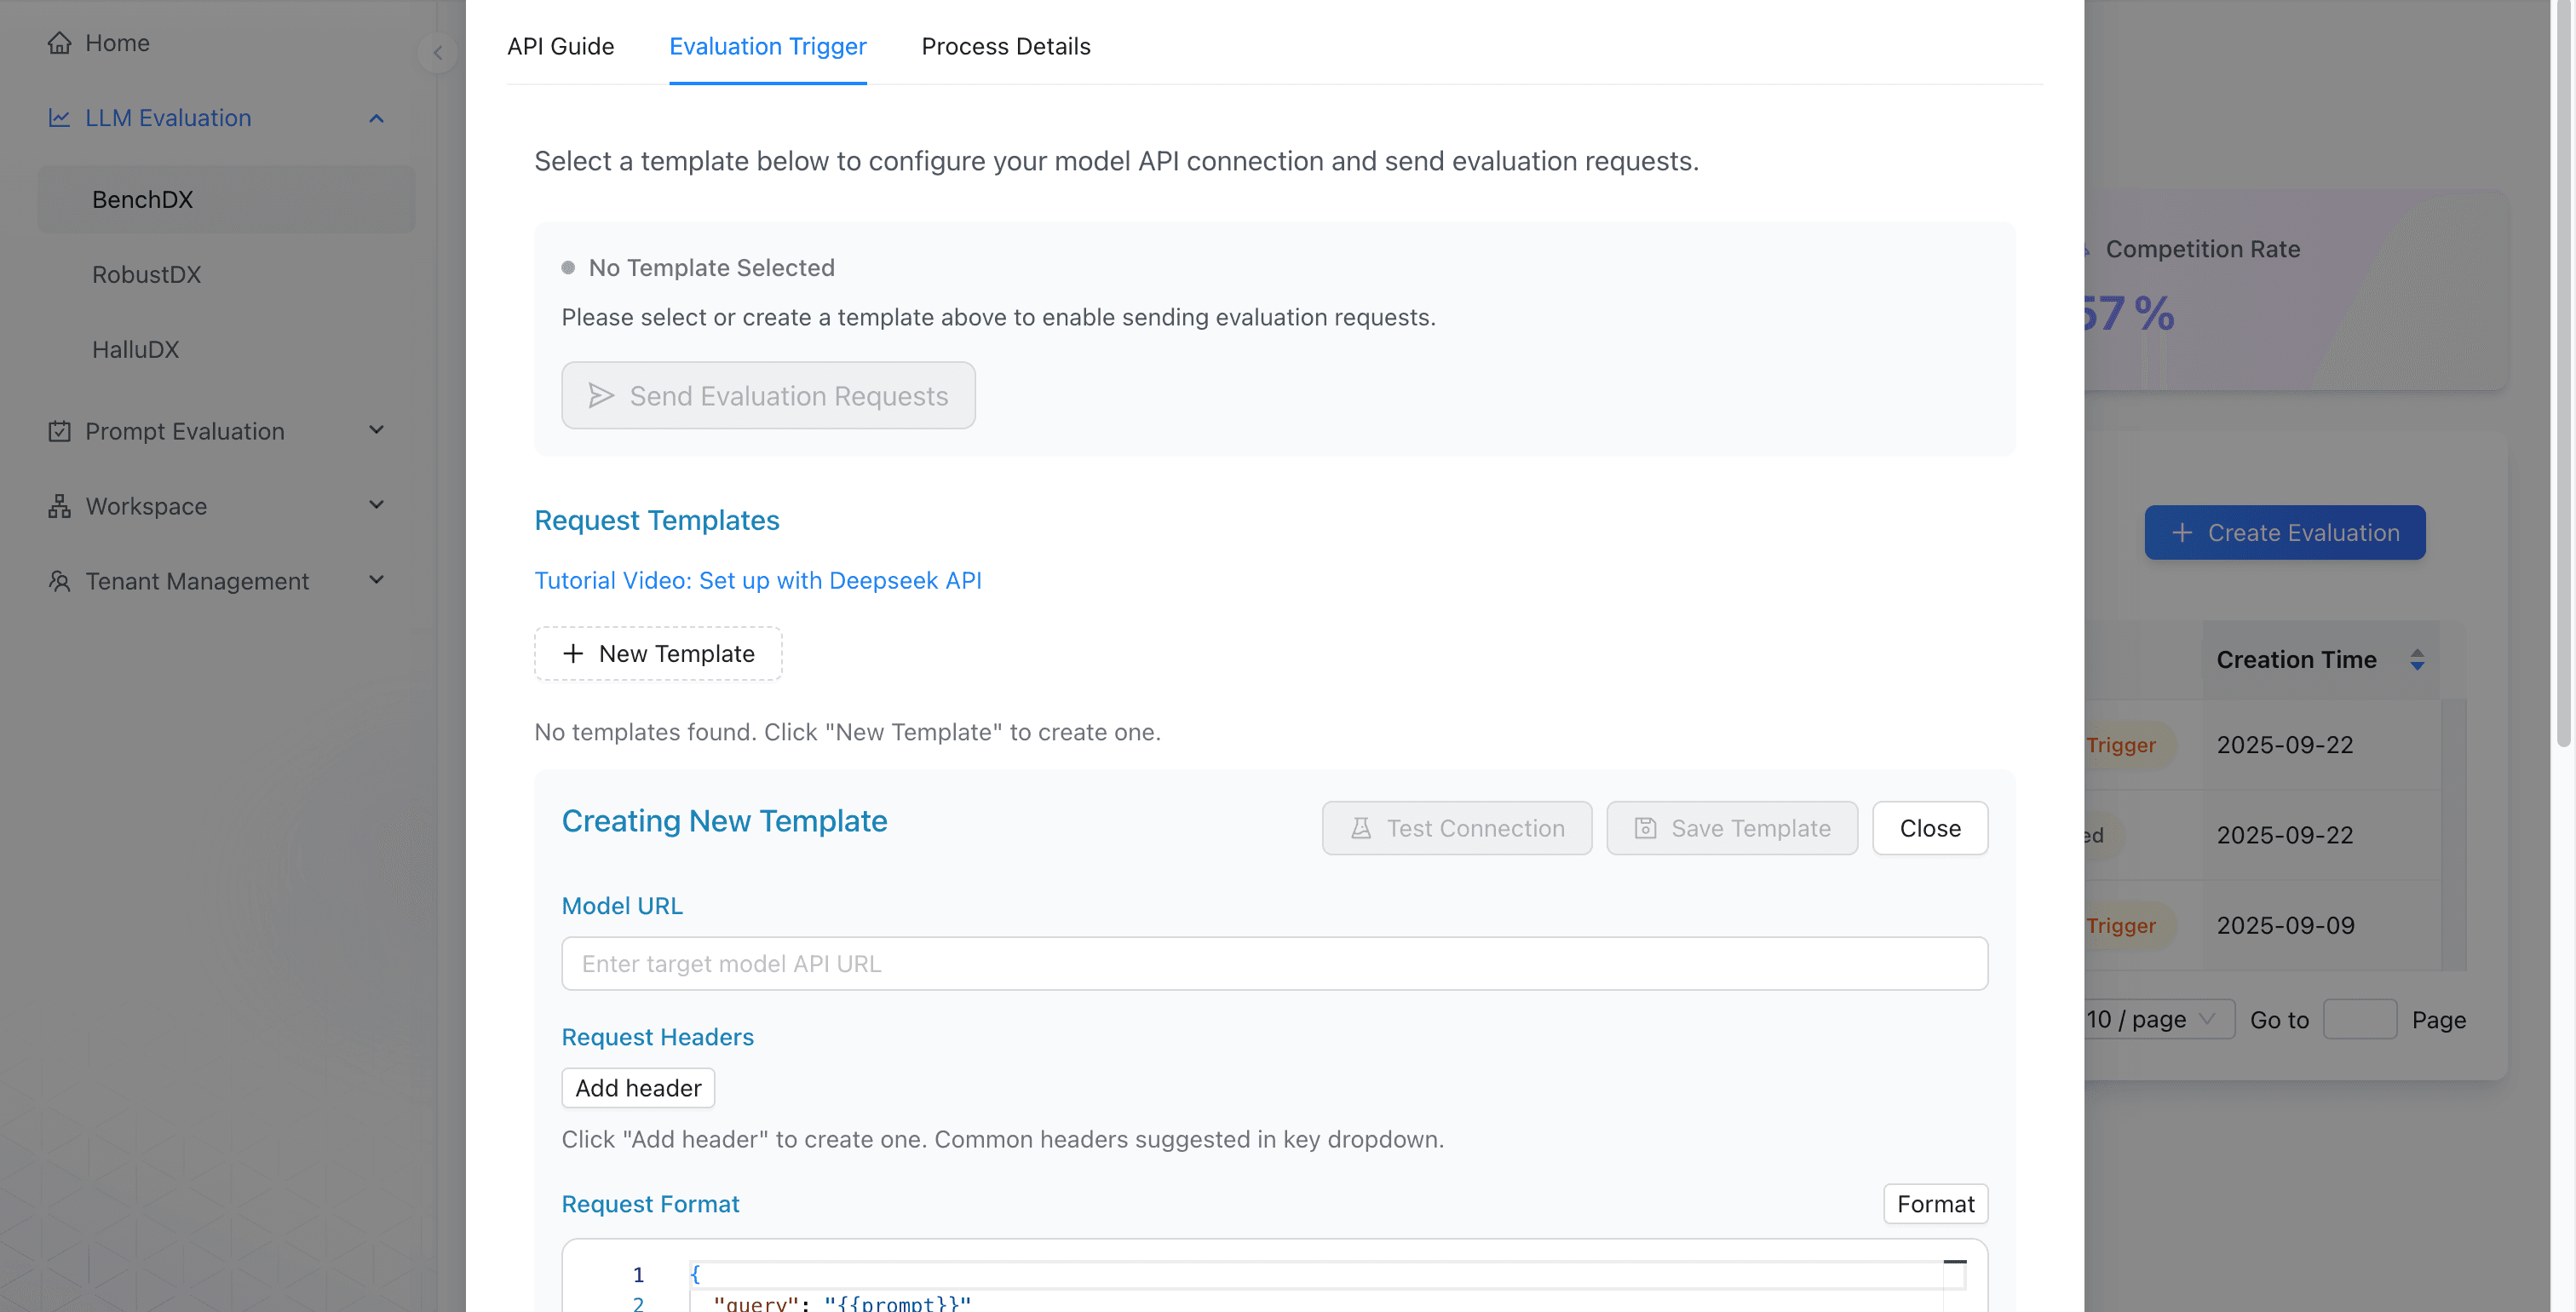
Create or select a trigger template
Reuse a verified template only when it matches the same target API contract.
Configure the destination
Enter the target model URL and add only the headers required by that endpoint.
Map the request
Define the payload and insert
{{prompt}}where each BenchDX prompt must be placed. For example, a target that accepts a query field can use{"query":"{{prompt}}"}.Map the response
Mirror the target response shape and place
{{response}}at the JSON path containing the model answer.Test and save when required
Run the template test and confirm AIDX extracts the actual answer text—not an empty value or wrapper object—before saving when the template flow requires it.
3. Send the evaluation requests
Select Send Evaluation Requests and confirm. AIDX sends every pending benchmark prompt through the saved template, extracts the corresponding answer, and preserves the originating trace for evaluation.
4. Monitor progress and handle errors
Open Process Details, or use the eye button in the Progress column, to inspect individual test cases.
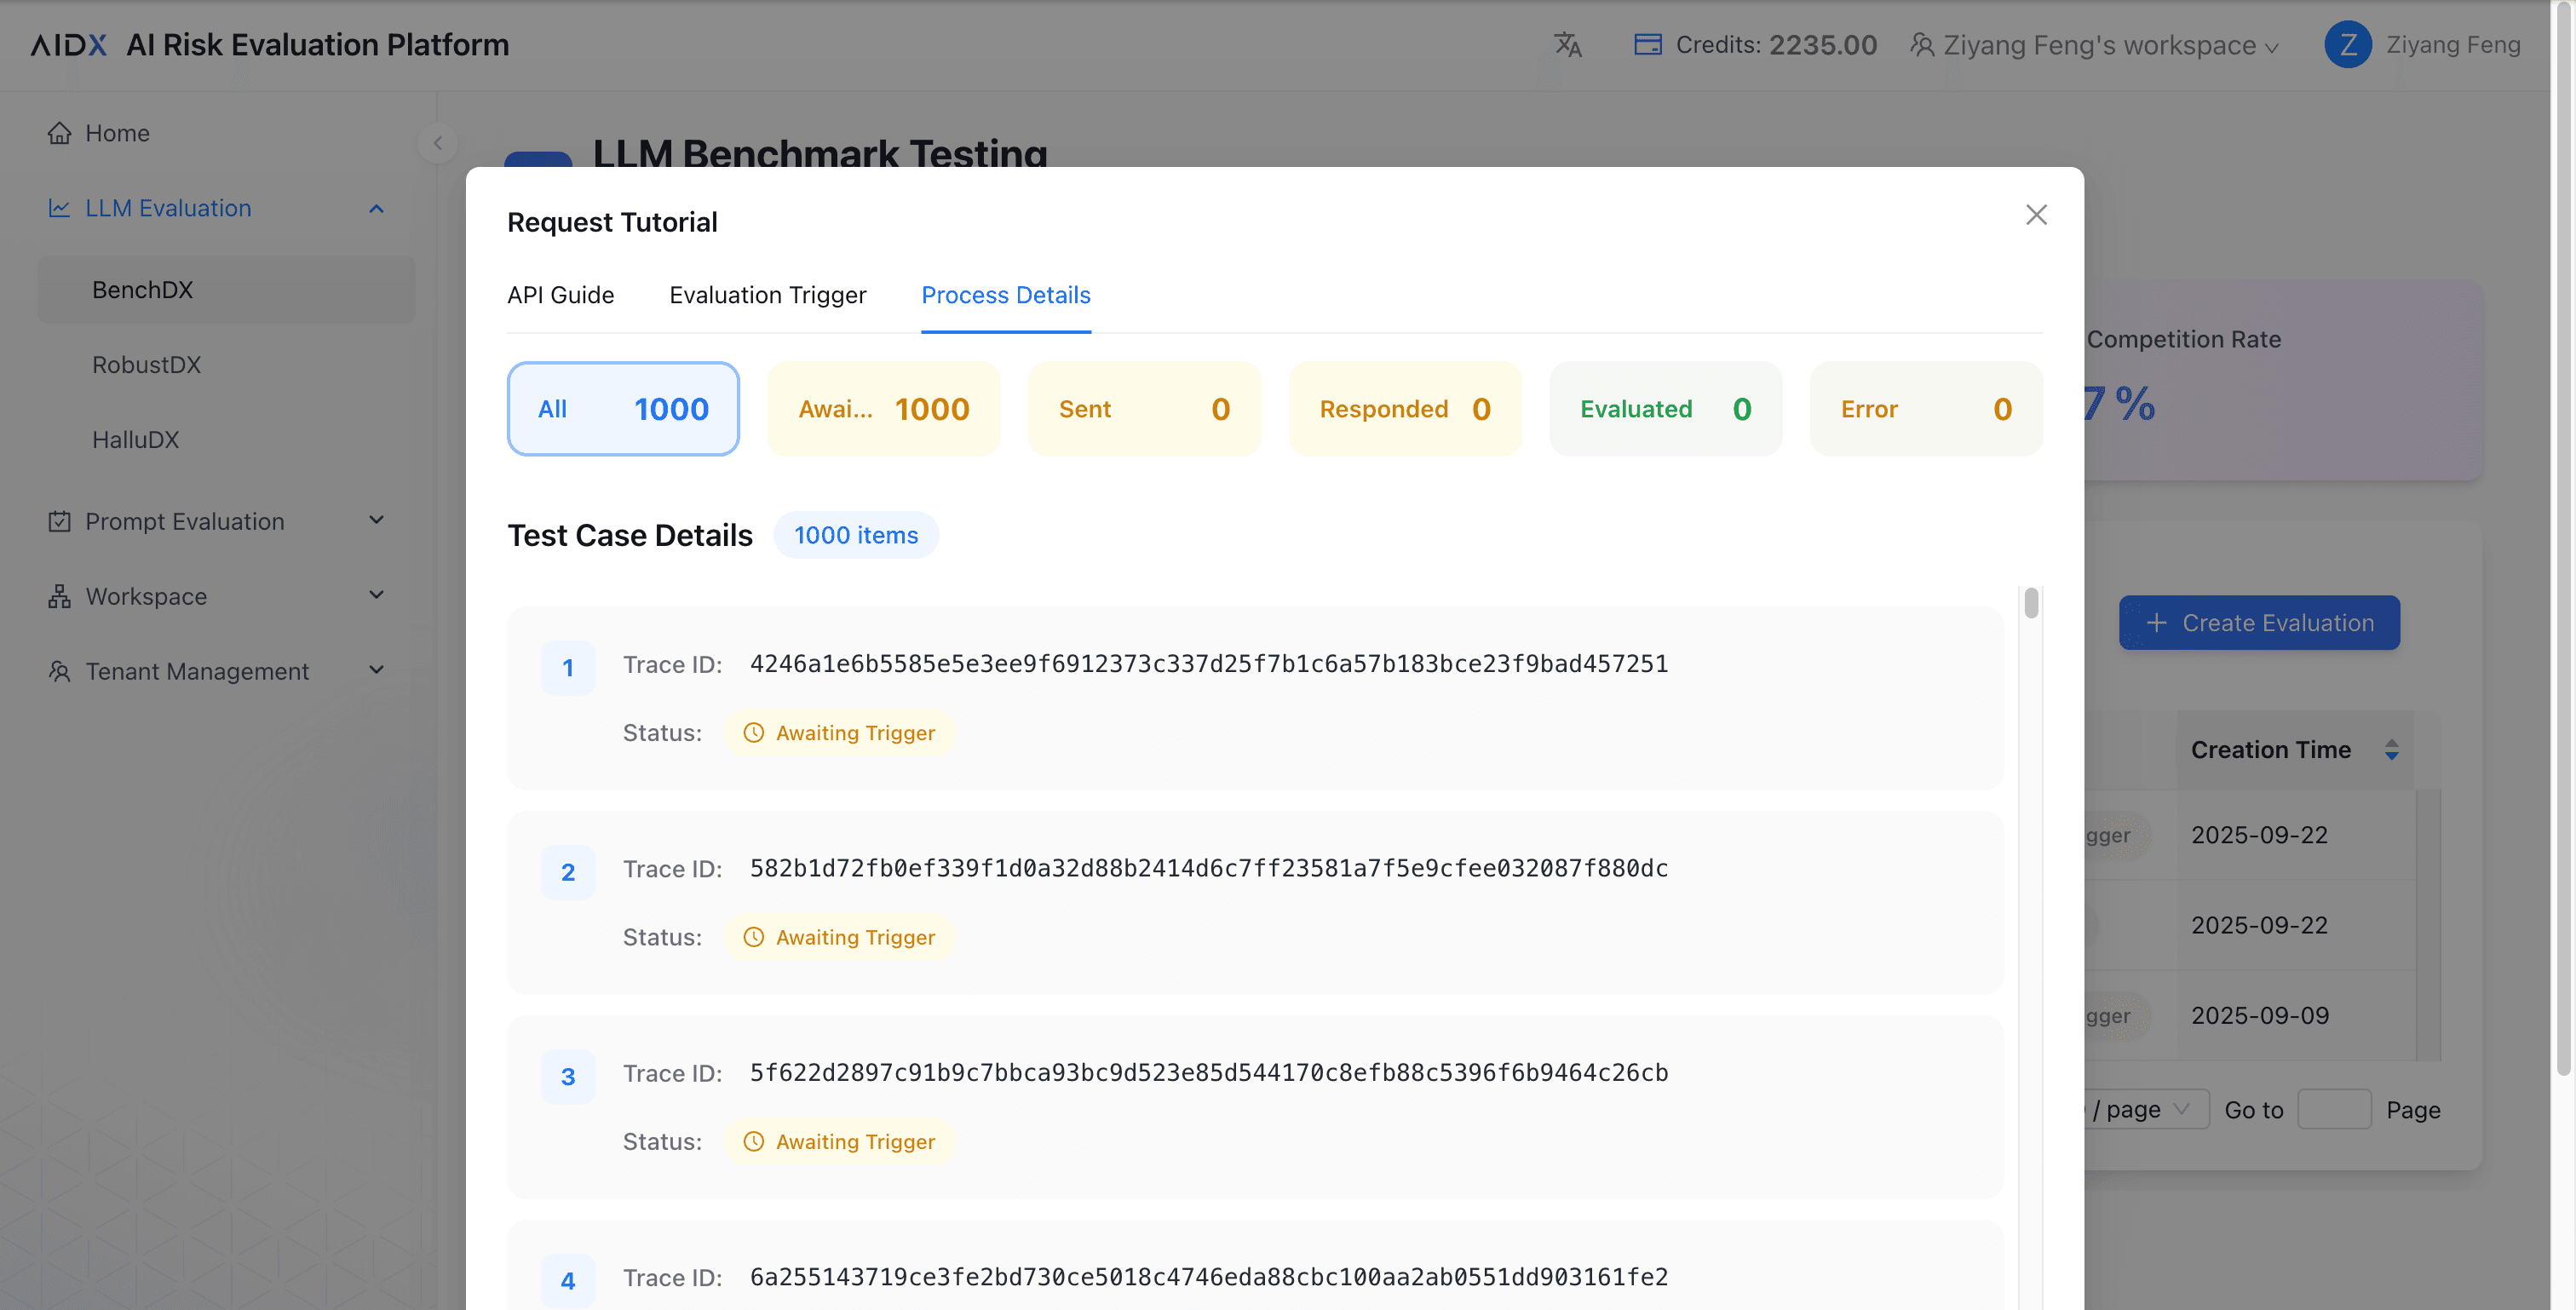
| Test-case state | Meaning |
|---|---|
Awaiting Trigger | The prompt has not yet been sent to the target model. |
Sent | The request was sent to the target model. |
Responded | A model response was received and recorded. |
Evaluated | Analysis for the test case is complete. |
Error | The request or response could not be processed. |
The normal trace path is Awaiting Trigger → Sent → Responded → Evaluated. At evaluation level, BenchDX moves through Awaiting Trigger, Processing, Analyzing, and Completed.
5. Review the BenchDX result
When the evaluation reaches Completed, select its name to open the BenchDX dashboard. Review the result in this order:
Evaluation Summary
Confirm the evaluation name, type, selected dataset, test count, creation date, average score, and median score.
Conclusion and Suggestions
Read the generated assessment and its recommended follow-up actions.
Performance Radar and Test Distribution
Compare average scores across dimensions and check how the test cases are distributed.
Model Version Comparison
When another evaluated version is available, select it and compare dimension scores with the current version.
Detailed Results and Score Definition
Expand each dimension, inspect category scores and score distributions, and use the displayed 1–5 definitions when interpreting the result.
Where to go next
Go deeper with BenchDX
Understand benchmark scope, scoring, evidence, and limitations in greater depth.
Read guide ↗Explore the platform
Learn where Workspace, API Guide, Evaluation Trigger, Process Details, and PAT controls live.
Read guide ↗Interpret evaluation results
Move from summary scores to dimensions, categories, and actionable findings.
Read guide ↗